LAMP环境--单层架构的安装和配置
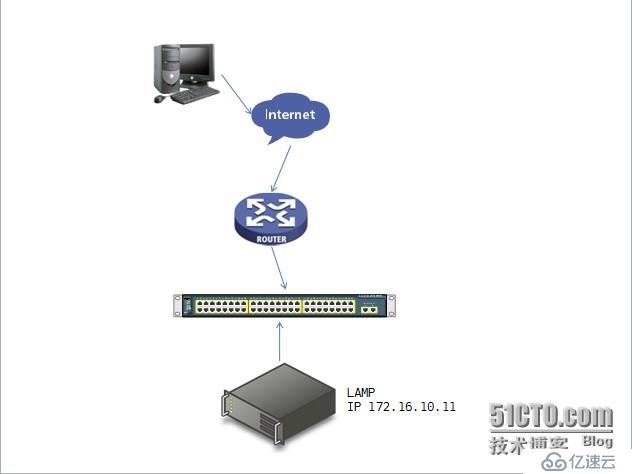
环境说明
路由器上设置nat转换
Lamp环境所使用的系统为 Red Hat Enterprise Linux 5.8 x86_64
内核版本 2.6.18-308.el5
Lamp的向外提供的主机名为 www.fangyu.com
因为是测试平台没有使用DNS,使用本地的/etc/hosts文件
所需软件包
httpd-2.2.29.tar.bz2
mysql-5.5.28-linux2.6-x86_64.tar.gz
php-5.3.29.tar.bz2
wordpress-3.3.1-zh_CN.zip
xcache-3.1.0.tar.gz
# 安装http之前首先安装pcre-devel包,因为httpd的rewirte模块依赖pcre-devel
[root@station1 ~]# yum -y install pcre-devel
[root@station1 ~]#
# 安装http
[root@station1 ~]# tar xf httpd-2.2.29.tar.bz2
[root@station1 ~]# cd httpd-2.2.29
[root@station1 httpd-2.2.29]# ./configure --prefix=/usr/local/apache \
> --sysconfdir=/etc/httpd \
> --enable-so \
> --enable-rewirte \
> --enable-ssl \
> --enable-modules=most \
> --enable-mods-shared=most \
> --with-mpm=prefork
[root@station1 httpd-2.2.29]#
[root@station1 httpd-2.2.29]# make && make install
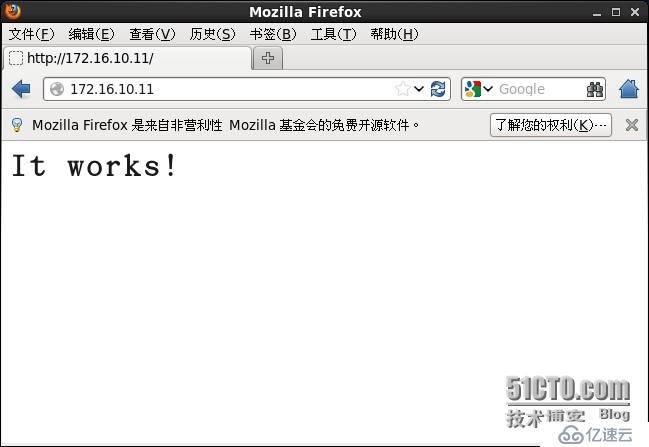
# 安装完成后启动httpd并测试
[root@station1 httpd-2.2.29]# cd /usr/local/apache/bin
[root@station1 bin]# ./apachectl start
[root@station1 bin]# netstat -tnlp | grep :80
tcp 0 0 :::80 :::* LISTEN 23458/httpd
[root@station1 bin]#
# 客户端浏览器测试
# 配置PATH搜索路径
# 这里echo要使用单引号,否则$PATH会将结果记录到该文件中
[root@station1 ~]# echo 'export PATH=$PATH:/usr/local/apache/bin' > /etc/profile.d/httpd.sh [root@station1 ~]# cat /etc/profile.d/httpd.sh export PATH=$PATH:/usr/local/apache/bin [root@station1 ~]# source /etc/profile.d/httpd.sh [root@station1 ~]#
# 安装Mysql数据库,使用通用二进制软件包
# 创建安装Mysql时所需要的用户
[root@station1 ~]# groupadd -r -g 3306 mysql
[root@station1 ~]# useradd -r -g 3306 -u 3306 mysql
[root@station1 ~]# tar xf mysql-5.5.28-linux2.6-x86_64.tar.gz -C /usr/local/
[root@station1 ~]# cd /usr/local/
[root@station1 local]# ln -s mysql-5.5.28-linux2.6-x86_64 mysql
[root@station1 local]# cd mysql
# 修改属主和属组
[root@station1 mysql]# chown -R mysql:mysql ./
[root@station1 mysql]# ll
total 76
drwxr-xr-x 2 mysql mysql 4096 Sep 16 15:56 bin
-rw-r--r-- 1 mysql mysql 17987 Aug 29 2012 COPYING
drwxr-xr-x 4 mysql mysql 4096 Sep 16 15:56 data
drwxr-xr-x 2 mysql mysql 4096 Sep 16 15:55 docs
drwxr-xr-x 3 mysql mysql 4096 Sep 16 15:56 include
-rw-r--r-- 1 mysql mysql 7604 Aug 29 2012 INSTALL-BINARY
drwxr-xr-x 3 mysql mysql 4096 Sep 16 15:56 lib
drwxr-xr-x 4 mysql mysql 4096 Sep 16 15:56 man
drwxr-xr-x 10 mysql mysql 4096 Sep 16 15:56 mysql-test
-rw-r--r-- 1 mysql mysql 2552 Aug 29 2012 README
drwxr-xr-x 2 mysql mysql 4096 Sep 16 15:56 scripts
drwxr-xr-x 27 mysql mysql 4096 Sep 16 15:56 share
drwxr-xr-x 4 mysql mysql 4096 Sep 16 15:56 sql-bench
drwxr-xr-x 2 mysql mysql 4096 Sep 16 15:56 support-files
[root@station1 mysql]#
# 创建Mysql存放数据文件的目录
[root@station1 mysql]# mkdir /mysql_data
[root@station1 mysql]# chown -R mysql:mysql /mysql_data
[root@station1 mysql]#
# 初始化数据库并指定用户和数据文件位置
[root@station1 mysql]# scripts/mysql_install_db --user=mysql --datadir=/mysql_data/
Installing MySQL system tables...
OK
Filling help tables...
OK
To start mysqld at boot time you have to copy
support-files/mysql.server to the right place for your system
PLEASE REMEMBER TO SET A PASSWORD FOR THE MySQL root USER !
To do so, start the server, then issue the following commands:
./bin/mysqladmin -u root password 'new-password'
./bin/mysqladmin -u root -h station1.example.com password 'new-password'
Alternatively you can run:
./bin/mysql_secure_installation
which will also give you the option of removing the test
databases and anonymous user created by default. This is
strongly recommended for production servers.
See the manual for more instructions.
You can start the MySQL daemon with:
cd . ; ./bin/mysqld_safe &
You can test the MySQL daemon with mysql-test-run.pl
cd ./mysql-test ; perl mysql-test-run.pl
Please report any problems with the ./bin/mysqlbug script!
[root@station1 mysql]#
[root@station1 mysql]# chown -R root ./
[root@station1 mysql]# ll
total 76
drwxr-xr-x 2 root mysql 4096 Sep 16 15:56 bin
-rw-r--r-- 1 root mysql 17987 Aug 29 2012 COPYING
drwxr-xr-x 4 root mysql 4096 Sep 16 15:56 data
drwxr-xr-x 2 root mysql 4096 Sep 16 15:55 docs
drwxr-xr-x 3 root mysql 4096 Sep 16 15:56 include
-rw-r--r-- 1 root mysql 7604 Aug 29 2012 INSTALL-BINARY
drwxr-xr-x 3 root mysql 4096 Sep 16 15:56 lib
drwxr-xr-x 4 root mysql 4096 Sep 16 15:56 man
drwxr-xr-x 10 root mysql 4096 Sep 16 15:56 mysql-test
-rw-r--r-- 1 root mysql 2552 Aug 29 2012 README
drwxr-xr-x 2 root mysql 4096 Sep 16 15:56 scripts
drwxr-xr-x 27 root mysql 4096 Sep 16 15:56 share
drwxr-xr-x 4 root mysql 4096 Sep 16 15:56 sql-bench
drwxr-xr-x 2 root mysql 4096 Sep 16 15:56 support-files
[root@station1 mysql]#
# 复制Mysql的配置文件和启动脚本,lib库,include头文件路径
[root@station1 mysql]# cp support-files/my-large.cnf /etc/my.cnf
[root@station1 mysql]# cp support-files/mysql.server /etc/init.d/mysqld
[root@station1 mysql]#
[root@station1 ~]# echo "/usr/local/mysql/lib" > /etc/ld.so.conf.d/mysql.conf
[root@station1 ~]# ldconfig -v | grep mysql
/usr/local/mysql/lib:
libmysqlclient.so.18 -> libmysqlclient_r.so.18.0.0
[root@station1 ~]#
[root@station1 ~]# ln -s /usr/local/mysql /usr/include/mysql
[root@station1 ~]#
# 配置PATH搜索路径
[root@station1 mysql]# echo 'export PATH=$PATH:/usr/local/mysql/bin' > /etc/profile.d/mysql.sh
[root@station1 mysql]# source /etc/profile.d/mysql.sh
[root@station1 mysql]#
# 测试Mysql[root@station1 mysql]# /etc/init.d/mysqld start
Starting MySQL.. [ OK ]
[root@station1 mysql]#
[root@station1 mysql]# mysql
Welcome to the MySQL monitor. Commands end with ; or \g.
Your MySQL connection id is 1
Server version: 5.5.28-log MySQL Community Server (GPL)
Copyright (c) 2000, 2012, Oracle and/or its affiliates. All rights reserved.
Oracle is a registered trademark of Oracle Corporation and/or its
affiliates. Other names may be trademarks of their respective
owners.
Type 'help;' or '\h' for help. Type '\c' to clear the current input statement.
mysql> \q
Bye
[root@station1 mysql]#
[root@station1 mysql]# mysqladmin -u root -p password 'fangyu421'
Enter password:
[root@station1 mysql]#
[root@station1 mysql]# mysql -u root -p
Enter password:
Welcome to the MySQL monitor. Commands end with ; or \g.
Your MySQL connection id is 4
Server version: 5.5.28-log MySQL Community Server (GPL)
Copyright (c) 2000, 2012, Oracle and/or its affiliates. All rights reserved.
Oracle is a registered trademark of Oracle Corporation and/or its
affiliates. Other names may be trademarks of their respective
owners.
Type 'help;' or '\h' for help. Type '\c' to clear the current input statement.
mysql>
# 安装php 使用module的方式结合
[root@station1 ~]# tar xf php-5.3.29.tar.bz2
[root@station1 ~]#
[root@station1 ~]# cd php-5.3.29
[root@station1 php-5.3.29]# ./configure --prefix=/usr/local/php \
> --with-mysql=/usr/local/mysql \
> --with-openssl \
> --with-mysqli=/usr/local/mysql/bin/mysql_config \
> --enable-mbstring \
> --with-freetype-dir \
> --with-jpeg-dir \
> --with-png-dir \
> --with-zlib \
> --with-libxml-dir=/usr \
> --enable-xml \
> --enable-sockets \
> --with-apxs2=/usr/local/apache/bin/apxs \
> --with-mcrypt \
> --with-config-file-path=/etc \
> --with-config-file-scan-dir=/etc/php.d \
> --with-bz2
[root@station1 ~]#
# httpd和php结合
# 修改httpd.conf配置文件,加入一行文本
[root@station1 httpd]# vi httpd.conf
AddType application/x-httpd-php .php
AddType application/x-httpd-php-source .phps
DirectoryIndex index.php index.html
[root@station1 httpd]#
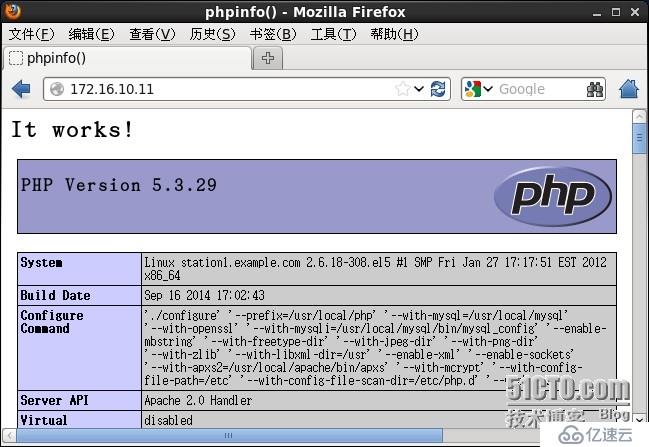
# 测试php
[root@station1 ~]# cd /usr/local/apache/htdocs/
[root@station1 htdocs]# ls
index.html
[root@station1 htdocs]# mv index.html index.php
[root@station1 htdocs]# vi index.php
< ?php
phpinfo();
? >
[root@station1 htdocs]#
[root@station1 htdocs]# apachectl stop
[root@station1 htdocs]# apachectl start
[root@station1 htdocs]#
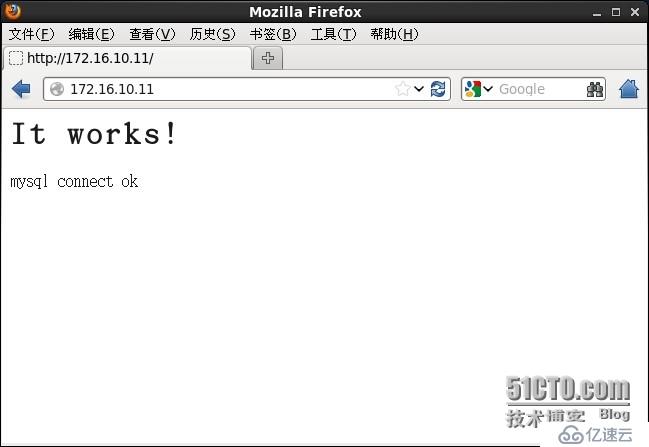
# 客户端进行测试
# 客户端测试php和mysql的连接
< ?php
$conn = mysql_connect('localhost','root','fangyu421');
if ($conn){
echo "mysql connect ok";
}else {
echo "mysql connect fail";
}
? >
# 为php提供xcache加速器
[root@station1 ~]# tar xf xcache-3.1.0.tar.gz
[root@station1 ~]# cd xcache-3.1.0
[root@station1 xcache-3.1.0]#
[root@station1 xcache-3.1.0]# ./configure --enable-xcache --with-php-config=/usr/local/php/bin/php-config
[root@station1 xcache-3.1.0]# make && make install
[root@station1 xcache-3.1.0]#
Installing shared extensions: /usr/local/php/lib/php/extensions/no-debug-non-zts-20090626/
[root@station1 xcache-3.1.0]#
# php和xcache结合
[root@station1 xcache-3.1.0]# mkdir /etc/php.d
[root@station1 xcache-3.1.0]# cp xcache.ini /etc/php.d/
[root@station1 xcache-3.1.0]#
[root@station1 ~]# vi /etc/php.d/xcache.ini
extension = /usr/local/php/lib/php/extensions/no-debug-non-zts-20090626/xcache.so 模块位置
xcache.admin.user = "fangyu"
xcache.admin.pass = "fangyu421"
xcache.size = 60M 根据自己主机的配置进行修改
xcache.count = 1 CPU个数
[root@station1 ~]#
[root@station1 ~]# vi /usr/local/apache/htdocs/index.php
[root@station1 ~]# apachectl stop
[root@station1 ~]# apachectl start
[root@station1 ~]#
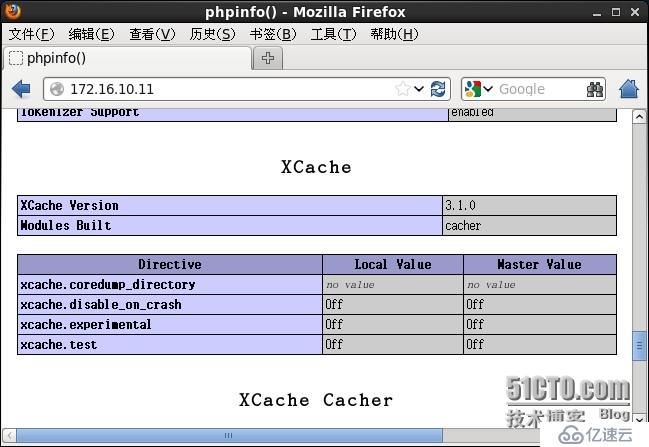
# 测试php是否已支持xcache
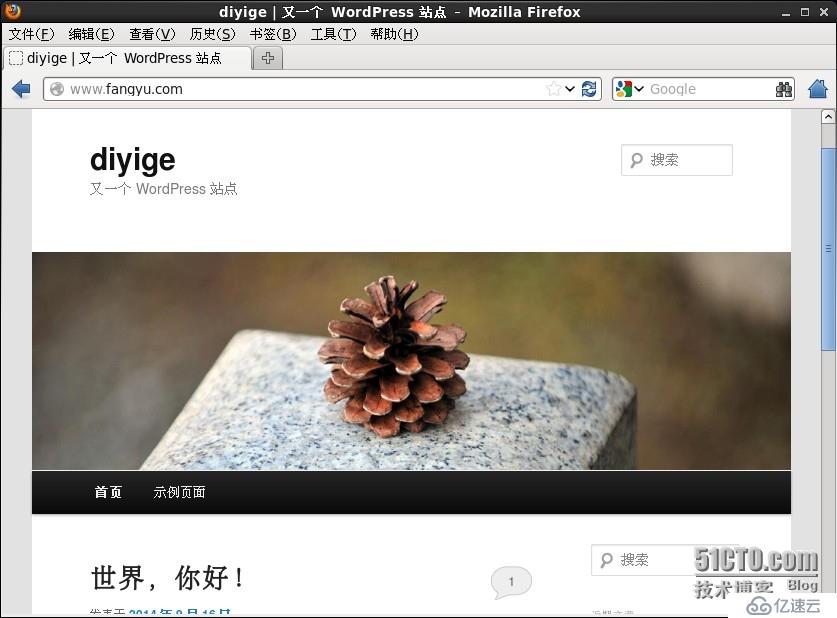
# 向外网提供服务
# 创建和配置wordpress需要的数据库和用户
mysql> create database wordpress;
Query OK, 1 row affected (0.15 sec)
mysql> grant all on wordpress.* to 'wp'@'localhost' identified by 'fangyu421';
Query OK, 0 rows affected (0.15 sec)
mysql> \q
Bye
[root@station1 ~]#
# 安装wordpress此处略过
# 客户端设置主机名/etc/hosts,如果不是测试环境,则在DNS上添加记录
[root@rhel6 ~]# cat /etc/hosts
127.0.0.1 localhost localhost.localdomain localhost4 localhost4.localdomain4
::1 localhost localhost.localdomain localhost6 localhost6.localdomain6
172.16.10.11 www.fangyu.com
[root@rhel6 ~]#
# 配置httpd,这里使用基于IP地址的虚拟主机
[root@station1 ~]# vi /etc/httpd/httpd.conf
# DocumentRoot "/usr/local/apache/htdocs" 注释掉
Include /etc/httpd/extra/httpd-vhosts.conf
[root@station1 ~]#
[root@station1 ~]# vi /etc/httpd/extra/httpd-vhosts.conf
< VirtualHost 172.16.10.11:80 >
ServerAdmin fangyu@fangyu.com
DocumentRoot "/usr/local/apache/htdocs/"
ServerName "www.fangyu.com"
ErrorLog "logs/fangyu.error_log"
CustomLog "logs/fangyu.access_log" common
< Directory "/var/local/apache/htdocs">
Options none
AllowOverride none
Order allow,deny
allow from all
< /Directory >
< /VirtualHost >
[root@station1 ~]#
客户端进行整体的测试结果