高可用Mysql安装配置方法和步骤
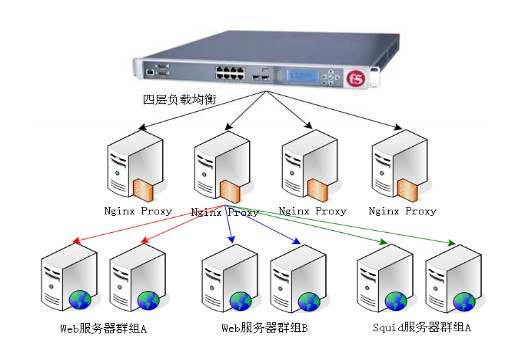
的负载均衡(Server Load Balancing)是对多台云服务器(计算集群)进行流量分发的网络服务设备。它可以通过流量分发,快速提高应用系统对外的服务能力;隐藏实际服务端口,增强内部系统的安全性;通过消除服务单点故障,提升应用系统的可靠性。今天就给大家介绍下
1 高可用Mysql安装配置
1.1 实验环境
云服务器角色 | 云服务器IP |
VIP | 192.168.8.200 |
Mycat1 | 192.168.8.22 |
Mycat2 | 192.168.8.23 |
Mysql1(Master1) | 192.168.8.24 |
Mysql2(Master2) | 192.168.8.25 |
Mysql3(Slave) | 192.168.8.26 |
1.2 Mysql安装配置
(192.168.8.24,192.168.8.25和192.168.8.26)三台服务器操作
1.2.1 Mysql安装
到官网下载mysql的yum源
https://www.mysql.com/
安装yum源rpm软件
rpm-ivh mysql57-community-release-el7-11.noarch.rpm
yum安装mysql
yuminstall mysql-community-server
1.2.2 Mysql初始化
启动mysql
systemctlstart mysqld
获取root密码
cat/var/log/mysqld.log | grep "temporary password"
2017-07-06T03:23:46.053467Z1 [Note] A temporary password is generated for root@localhost: iGUl/j*_r1*z
修改root密码
mysql–uroot –p
SETPASSWORD=PASSWORD('newpassword');
1.3 Mysql主主配置
(192.168.8.24和192.168.8.25)两台服务器操作
1.3.1 Mysql配置
192.168.8.24配置:
vi/etc/my.cnf
增加如下内容:
[mysqld] symbolic-links=0 log-error=/var/log/mysqld.log pid-file=/var/run/mysqld/mysqld.pid
server_id = 1 log-bin=mysql-bing log_bin_trust_function_creators=TRUE log-slave-updates sync_binlog=1 auto_increment_offset=1 auto_increment_increment=2 slave-skip-errors=all lower_case_table_names=1 character_set_server=utf8 skip-name-resolve
[mysql] default-character-set=utf8 [mysqld_safe] default-character-set=utf8 [mysql.server] default-character-set=utf8 [client] default-character-set=utf8 |
192.168.8.25配置:
vi/etc/my.cnf
增加如下内容:
symbolic-links=0
log-error=/var/log/mysqld.log pid-file=/var/run/mysqld/mysqld.pid
server_id = 2 log-bin=mysql-bing log_bin_trust_function_creators=TRUE log-slave-updates sync_binlog=1 auto_increment_offset=1 auto_increment_increment=2 slave-skip-errors=all lower_case_table_names=1 character_set_server = utf8 skip-name-resolve
[mysql] default-character-set=utf8 [mysqld_safe] default-character-set=utf8 [mysql.server] default-character-set = utf8 [client] default-character-set = utf8 |
服务器1(192.168.8.24)和服务器2(192.168.8.25)重启服务:
systemctlrestart mysqld
1.3.2 Sql配置
服务器1(192.168.8.24)操作:
mysql–u root –p
mysql>GRANT REPLICATION SLAVE ON *.* to 'repluser'@'192.168.8.25' identified by'123456';
mysql>flush privileges;
mysql>flush tables with read lock; #防止进入新的数据
#查看bin文件和position,之后需要用到
mysql>SHOW MASTER STATUS;
+------------------+----------+--------------+------------------+
|File | Position |Binlog_Do_DB | Binlog_Ignore_DB |
+------------------+----------+--------------+------------------+
| mysql-bin.000004 | 106 | | |
+------------------+----------+--------------+------------------+
服务器2(192.168.8.25)操作:
mysql–u root –p
mysql>GRANT REPLICATION SLAVE ON *.* to 'repluser'@'192.168.8.24' identified by'123456';
mysql>flush privileges;
mysql>flush tables with read lock; #防止进入新的数据
#查看bin文件和position,之后需要用到
mysql>SHOW MASTER STATUS;
+------------------+----------+--------------+------------------+
|File | Position |Binlog_Do_DB | Binlog_Ignore_DB |
+------------------+----------+--------------+------------------+
| mysql-bin.000004 | 350 | | |
+------------------+----------+--------------+------------------+
服务器1(192.168.8.24)操作:
mysql>CHANGE MASTER TO MASTER_HOST='192.168.8.25',MASTER_USER='repluser',MASTER_PASSWORD='123456',MASTER_LOG_FILE='mysql-bin.000004',MASTER_LOG_POS=350,MASTER_PORT=3306;
服务器2(192.168.8.25)操作:
mysql>CHANGE MASTER TOMASTER_HOST='192.168.8.24',MASTER_USER='repluser',MASTER_PASSWORD='123456',MASTER_LOG_FILE='mysql-bin.000004',MASTER_LOG_POS=106,MASTER_PORT=3306;
服务器1(192.168.8.24)和服务器2(192.168.8.25)分别操作:
mysql> unlock tables;
mysql> start slave;
mysql> show slave status\G;
*************************** 1.row ***************************
主要关注以下 2 个参数:
...
...
Slave_IO_Running: Yes
Slave_SQL_Running: Yes
...
...
1.3.3 测试
服务器1(192.168.8.24)新增加库:
mysql>show databases;
+--------------------+
|Database |
+--------------------+
|information_schema |
|mysql |
|test |
+--------------------+
mysql>create database tom;
mysql>show databases;
+--------------------+
|Database |
+--------------------+
|information_schema |
|mysql |
|test |
|tom |
+--------------------+
服务器2(192.168.8.25)查看自动新增加库:
mysql>show databases;
+--------------------+
|Database |
+--------------------+
|information_schema |
|mysql |
|test |
|tom |
+--------------------+
服务器2(192.168.8.25)将新增加库删除:
mysql>drop database tom;
mysql>show databases;
+--------------------+
|Database |
+--------------------+
|information_schema |
|mysql |
|test |
+--------------------+
服务器1(192.168.8.24)将自动删除:
mysql>show databases;
+--------------------+
|Database |
+--------------------+
|information_schema |
|mysql |
|test |
+--------------------+
至此说明双方同步成功
1.4 Mysql主从配置
(192.168.8.24和192.168.8.26)两台服务器操作
1.4.1 Mysql配置
192.168.8.24配置在上节已经完成。略过
192.168.8.26配置:
vi/etc/my.cnf
增加如下内容:
[mysqld] symbolic-links=0 log-error=/var/log/mysqld.log pid-file=/var/run/mysqld/mysqld.pid
server_id = 3 log-bin=mysql-bing log_bin_trust_function_creators=TRUE log-slave-updates sync_binlog=1 auto_increment_offset=1 auto_increment_increment=2 slave-skip-errors=all lower_case_table_names=1 character_set_server = utf8 skip-name-resolve
[mysql] default-character-set=utf8 [mysqld_safe] default-character-set=utf8 [mysql.server] default-character-set = utf8 [client] default-character-set = utf8 |
重启服务
systemctlrestart mysqld
1.4.2 Sql配置
服务器1(192.168.8.24)操作:
mysql–u root –p
mysql>GRANT REPLICATION SLAVE ON *.* to 'repluser'@'192.168.8.26' identified by'123456';
mysql>flush privileges;
mysql>flush tables with read lock; #防止进入新的数据
#查看bin文件和position,之后需要用到
mysql>SHOW MASTER STATUS;
+------------------+----------+--------------+------------------+
|File | Position |Binlog_Do_DB | Binlog_Ignore_DB |
+------------------+----------+--------------+------------------+
| mysql-bin.000004 | 106 | | |
+------------------+----------+--------------+------------------+
服务器2(192.168.8.26)操作:
mysql>CHANGE MASTER TO MASTER_HOST='192.168.8.24',MASTER_USER='repluser',MASTER_PASSWORD='123456',MASTER_LOG_FILE='mysql-bin.000004',MASTER_LOG_POS=106,MASTER_PORT=3306;
服务器1(192.168.8.24)操作:
mysql>unlock tables;
服务器2(192.168.8.26)操作:
mysql>start slave;
mysql>show slave status\G;
***************************1. row ***************************
主要关注以下 2 个参数:
...
...
Slave_IO_Running:Yes
Slave_SQL_Running:Yes
...
...
1.4.3 测试
服务器1(192.168.8.24)新增加库:
mysql>show databases;
+--------------------+
|Database |
+--------------------+
|information_schema |
|mysql |
|test |
+--------------------+
mysql>create database tom;
mysql>show databases;
+--------------------+
|Database |
+--------------------+
|information_schema |
|mysql |
|test |
|tom |
+--------------------+
服务器2(192.168.8.26)查看自动新增加库:
mysql>show databases;
+--------------------+
|Database |
+--------------------+
|information_schema |
|mysql |
|test |
|tom |
+--------------------+
1.5 Mycat安装配置
(192.168.8.22和192.168.8.23)两台服务器操作
1.5.1 Mycat安装
安装java
yuminstall java-1.8.0-openjdk
下载mycat:
http://dl.mycat.io/
解压安装包
tarzxvf Mycat-server-1.7.0-DEV-20170416134921-linux.tar.gz
mvMycat /usr/local/mycat
配置环境变量
vi/etc/profile,在系统环境变量文件中增加 MYCAT_HOME=/usr/local/mycat
1.5.2 Mycat配置
cd/usr/local/mycat/conf
viserver.xml
修改如下配置
|
vischema.xml
只保留以下配置读写分离,其他删除
writeType="0" dbType="mysql" dbDriver="native" switchType="1" slaveThreshold="100"> password="Test@123">
password="Test@123" />
|
启动mycat
/usr/local/mycat/bin/mycatstart
1.6 keepalived安装配置
1.6.1 实验环境
服务器角色 | 服务器IP |
VIP1 | 192.168.8.200 |
LVS1 | 192.168.8.10 |
LVS2 | 192.168.8.11 |
1.6.2 安装keepalived
yuminstall -y keepalived ipvsadm
1.6.3 配置keepalived
vim/etc/keepalived/keepalived.conf
LVS-DR-Master上,其配置如下(192.168.8.10操作):
! Configuration File for keepalived
global_defs { notification_email { acassen@firewall.loc failover@firewall.loc sysadmin@firewall.loc } notification_email_from Alexandre.Cassen@firewall.loc smtp_server 192.168.200.1 smtp_connect_timeout 30 router_id LVS_DEVEL }
vrrp_instance VI_1 { state BACKUP interface ens160 virtual_router_id 51 priority 100 advert_int 1 authentication { auth_type PASS auth_pass 123456 } virtual_ipaddress { 192.168.8.100 192.168.8.200 } }
virtual_server 192.168.8.100 80 { delay_loop 6 lb_algo rr lb_kind DR nat_mask 255.255.255.0 persistence_timeout 50 protocol TCP
real_server 192.168.8.12 80 { weight 1 TCP_CHECK { connect_timeout 3 nb_get_retry 3 delay_before_retry 3 connect_port 80 } }
real_server 192.168.8.13 80 { weight 1 TCP_CHECK { connect_timeout 3 nb_get_retry 3 delay_before_retry 3 connect_port 80 } } }
virtual_server 192.168.8.100 21 { delay_loop 6 lb_algo rr lb_kind DR nat_mask 255.255.255.0 persistence_timeout 50 protocol TCP
real_server 192.168.8.12 21 { weight 1 TCP_CHECK { connect_timeout 3 nb_get_retry 3 delay_before_retry 3 connect_port 21 } }
real_server 192.168.8.13 21 { weight 1 TCP_CHECK { connect_timeout 3 nb_get_retry 3 delay_before_retry 3 connect_port 21 } } }
virtual_server 192.168.8.200 8066 { delay_loop 6 lb_algo rr lb_kind DR nat_mask 255.255.255.0 persistence_timeout 50 protocol TCP
real_server 192.168.8.22 8066 { weight 1 TCP_CHECK { connect_timeout 3 nb_get_retry 3 delay_before_retry 3 connect_port 8066 } }
real_server 192.168.8.23 8066 { weight 1 TCP_CHECK { connect_timeout 3 nb_get_retry 3 delay_before_retry 3 connect_port 8066 } } } |
LVS-DR-Backup上,其配置如下(192.168.8.11操作):
! Configuration File for keepalived
global_defs { notification_email { acassen@firewall.loc failover@firewall.loc sysadmin@firewall.loc } notification_email_from Alexandre.Cassen@firewall.loc smtp_server 192.168.200.1 smtp_connect_timeout 30 router_id LVS_DEVEL }
vrrp_instance VI_1 { state BACKUP interface ens160 virtual_router_id 51 priority 90 advert_int 1 authentication { auth_type PASS auth_pass 123456 } virtual_ipaddress { 192.168.8.100 192.168.8.200 } }
virtual_server 192.168.8.100 80 { delay_loop 6 lb_algo rr lb_kind DR nat_mask 255.255.255.0 persistence_timeout 50 protocol TCP
real_server 192.168.8.12 80 { weight 1 TCP_CHECK { connect_timeout 3 nb_get_retry 3 delay_before_retry 3 connect_port 80 } }
real_server 192.168.8.13 80 { weight 1 TCP_CHECK { connect_timeout 3 nb_get_retry 3 delay_before_retry 3 connect_port 80 } } }
virtual_server 192.168.8.100 21 { delay_loop 6 lb_algo rr lb_kind DR nat_mask 255.255.255.0 persistence_timeout 50 protocol TCP
real_server 192.168.8.12 21 { weight 1 TCP_CHECK { connect_timeout 3 nb_get_retry 3 delay_before_retry 3 connect_port 21 } }
real_server 192.168.8.13 21 { weight 1 TCP_CHECK { connect_timeout 3 nb_get_retry 3 delay_before_retry 3 connect_port 21 } } }
virtual_server 192.168.8.200 8066 { delay_loop 6 lb_algo rr lb_kind DR nat_mask 255.255.255.0 persistence_timeout 50 protocol TCP
real_server 192.168.8.22 8066 { weight 1 TCP_CHECK { connect_timeout 3 nb_get_retry 3 delay_before_retry 3 connect_port 8066 } }
real_server 192.168.8.23 8066 { weight 1 TCP_CHECK { connect_timeout 3 nb_get_retry 3 delay_before_retry 3 connect_port 8066 } } } |
1.6.4 虚拟IP脚本
mycat服务器(192.168.8.22和192.168.8.23)操作
chmod+x /etc/rc.d/init.d/functions
vi/usr/local/bin/realserver.sh
#!/bin/bash #description: Config realserver
VIP=192.168.8.200
/etc/rc.d/init.d/functions
case "$1" in start) /sbin/ifconfig lo:0 $VIP netmask 255.255.255.255 broadcast $VIP /sbin/route add -host $VIP dev lo:0 echo "1" >/proc/sys/net/ipv4/conf/lo/arp_ignore echo "2" >/proc/sys/net/ipv4/conf/lo/arp_announce echo "1" >/proc/sys/net/ipv4/conf/all/arp_ignore echo "2" >/proc/sys/net/ipv4/conf/all/arp_announce sysctl -p >/dev/null 2>&1 echo "RealServer Start OK" ;; stop) /sbin/ifconfig lo:0 down /sbin/route del $VIP >/dev/null 2>&1 echo "0" >/proc/sys/net/ipv4/conf/lo/arp_ignore echo "0" >/proc/sys/net/ipv4/conf/lo/arp_announce echo "0" >/proc/sys/net/ipv4/conf/all/arp_ignore echo "0" >/proc/sys/net/ipv4/conf/all/arp_announce echo "RealServer Stoped" ;; *) echo "Usage: $0 {start|stop}" exit 1 esac
exit 0 |
启动脚本
/usr/local/bin/realserver.shstart
1.6.5 启动keepalived
LVS-DR-Master(192.168.8.22)和LVS-DR-Backup(192.168.8.13)分别操作:
/etc/init.d/keepalivedstart
通过ipvsadm -L命令查看VIP是否能成功映射到后端服务。如果失败了,可通过/var/log/messages日志定位keepalived启动失败的原因。
IPVirtual Server version 1.2.1 (size=4096)
ProtLocalAddress:Port Scheduler Flags
-> RemoteAddress:Port Forward Weight ActiveConn InActConn
TCP 123.com:8066 rr
-> 192.168.8.22:8066 Route 1 0 0
-> 192.168.8.23:8066 Route 1 0 0
如果大家还有什么地方需要了解的可以在官网找我们的专业技术工程师的,技术工程师在行业内拥有十几年的经验了,所以会比小编回答的更加详细专业。官网链接www.yisu.com
上一篇:苹果mac系统是开源的吗?
下一篇:什么叫高可用负载均衡架构